


Tactical Supremacy: A Deep-Dive Manual for Helldivers 2 Mastery
The transition from the top-down perspective of the original Helldivers to the visceral, third-person chaos of Helldivers 2 has redefined the cooperative shooter genre. While the propaganda of Super Earth emphasizes bravery and sacrifice, the reality of high-level gameplay (Difficulty 7–9) demands cold, calculated mechanical precision and a profound understanding of invisible systems. To survive the Galactic War, a Helldiver must look past the flashy explosions and master the nuances of "Armor Penetration" thresholds, "Stagger" values, and the subtle "Despawn" logic of the enemy hordes. This guide serves as a technical blueprint for transitioning from a disposable grunt to a legendary agent of Managed Democracy.
1. Pre-Drop Logistics: Optimizing Loadouts for Target Biomes

Before your hellpod even touches the soil of Malevelon Creek or Fenris III, your success is dictated by your ship’s terminal. In Helldivers 2, loadouts are not about personal preference; they are about "Role Coverage." A common rookie mistake is four players bringing the "Quasar Cannon." While powerful, this leaves the team vulnerable to swarm saturation. A balanced squad must account for anti-tank, crowd control, and "utility" (such as smoke or EMS) to manipulate the battlefield.
Furthermore, the choice of "Booster" is a collective strategic decision. "Hellpod Space Optimization" is non-negotiable for high-level drops, ensuring you land with full ammo and stims. However, on "Stamina-draining" planets like those with extreme heat, the "Stamina Enhancement" booster becomes the difference between outrunning a Stalker and being shredded. You must coordinate with your team to ensure no boosters are duplicated, maximizing the passive buffs provided to the entire squad.
2. Atmospheric Re-entry: The Art of the Tactical Drop
The first 30 seconds of a mission are the most critical. Landing directly on a "Red Zone" (enemy outpost) can be a high-reward strategy for a quick clear, but on Helldive difficulty, it often leads to an immediate "Reinforcement Loop" where the squad is wiped before they can call down their Support Weapons. The veteran approach is to land in a "Blue Zone"—a neutral area near a high-vantage point—allowing the team to establish their gear before initiating contact.
High-Altitude Maneuvering
While descending in your Hellpod, use the directional keys to steer toward elevated terrain. Landing on top of a rock formation that is inaccessible to ground-bound Terminids provides a significant tactical advantage. From here, you can deploy "Sentries" that have clear lines of sight, safely out of reach of melee-focused enemies. However, be wary of Automaton fire; high ground offers no protection against a rocket-devastator’s volley.
3. Ballistics and Armor: Understanding the Penetration Math
Combat in Helldivers 2 is governed by a complex "Armor Penetration" (AP) system. Every enemy part has an armor rating from 1 to 10. If your weapon’s AP is lower than the armor rating, your bullets will ricochet (indicated by a gray shield icon). If it matches, you deal 50% damage (white hitmarker). If it exceeds, you deal 100% (red hitmarker). Mastering this math is essential for deciding whether to engage a target or retreat.
Weapon Classification and Utility
- Light Armor Penetration: Standard rifles (Liberator, Defender). Effective against scavengers and basic troopers.
- Medium Armor Penetration: Weapons like the "Liberator Penetrator" or "Slugger." Essential for targeting the vents of Hulks or the faces of Hive Guards.
- Heavy Armor Penetration: Support weapons (Anti-Tank, Recoilless Rifle). These are the only tools capable of stripping the leg armor off a Charger or piercing a Titan’s skull.
4. Stratagem Synchronization: Timing the Blue-Beam Rain

Stratagems are the primary "Economy" of a Helldiver. The mistake most players make is "Overkill"—throwing an Orbital Railcannon Strike at a target that a well-placed EAT-17 (Expendable Anti-Tank) could have handled. You must manage your cooldowns to ensure that the team always has a "Heavy Response" ready. In high-level play, the "EMS Mortar Sentry" is a tier-S pick, as it freezes entire waves, allowing the team to use cheaper, high-volume fire instead of expensive orbitals.
The "Danger Close" Protocol
When calling in "Eagle" strikes, you must understand the "Axis of Attack." An Eagle Airstrike drops bombs in a horizontal line perpendicular to where you threw the beacon. An Eagle Cluster Bomb has a wider, more unpredictable spread. To avoid friendly fire, always communicate the "Drop Line" to your team. If you are being chased, throw the beacon 20 meters in front of you and keep running; the bombs will land exactly where your pursuers will be in three seconds.
5. Terminid Suppression: Managing the Bug Breach
The Terminid faction is a test of "Horde Management." The primary threat is not the Titan, but the "Shrieker" and the "Stalker." Stalkers, in particular, will hunt you from their hidden nests. If you see a Stalker, the mission objective becomes secondary; you must track their origin path and destroy the nest immediately. Failure to do so will result in an infinite loop of stealth-attacks that can deplete your reinforcements in minutes.
Bug Breach Mitigation
- Target the Pheromones: Watch for the small orange smoke emitted by a Scavenger or Warrior. If you kill them mid-animation, you can prevent the Breach entirely.
- Fire for Effect: The "Incendiary Breaker" or "Flamethrower" provides "Area Denial." By lighting the ground at the center of a breach, you can kill 80% of the small mobs before they even move.
- Charger Matador: Do not run away from a Charger in a straight line. Wait for the charge, then dive toward its side at a 45-degree angle. This forces the Charger into a long "turning" animation, exposing the soft flesh behind its legs.
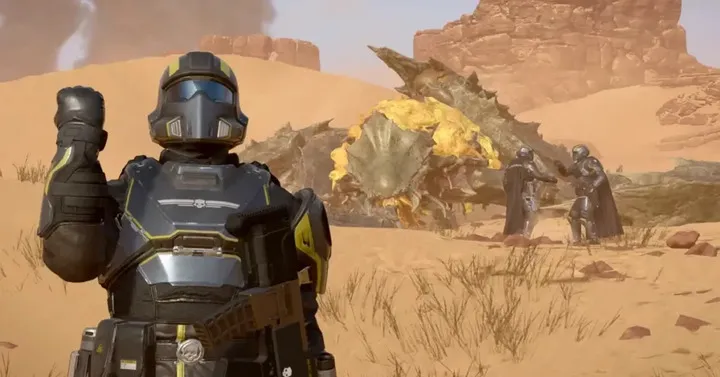
6. Automaton Sabotage: Guerilla Warfare Against the Bots
Fighting the Automatons is a completely different game; it is a "Cover-Based Shooter." Unlike bugs, bots have infinite range and perfect accuracy. The core strategy is "Visual Break." If you are being suppressed by a Heavy Devastator, you must use smoke stratagems or terrain to break line-of-sight. Once the bot loses sight of you, its AI enters a "Search" mode, allowing you to flank its weak point (the glowing heat sinks on its back).
Dismantling the Steel Tide
- Hulk Weakpoints: A Hulk’s faceplate is vulnerable to "Medium Penetration." Two shots from an "Anti-Materiel Rifle" or a "Railgun" to the red eye will drop it instantly.
- Dropship Interception: If you have an "Autocannon" or "Recoilless Rifle," aim for one of the four engines of an incoming Dropship. Destroying the engine causes the ship to crash, often killing all passengers before they deploy.
- The Shield Wall: Use "Impact Grenades" against Devastators with shields. The explosion bypasses the shield entirely, staggering the bot and exposing its head.
7. Resource Extraction: Sample Security and the Map Meta
Samples (Green, Orange, and Pink) are the only "Permanent" progression in Helldivers 2. Losing 20 Rare Samples because of a greedy play at the 35-minute mark is a disaster. High-level players utilize the "Drop Strategy": when passing near the Extraction Zone mid-mission, drop your collected samples on the landing pad. This ensures that even if you die in a distant corner of the map, your samples are already safe at the exit.
Map Icons and "PoI" Scanning
The "Mini-map" is your most powerful tool. By "Ping-Scanning" (hovering your cursor over the map), you can locate hidden "Points of Interest" (PoIs) indicated by a small diamond icon. These areas contain Medals, Super Credits, and support weapons. If the diamond turns into a "crate" icon, it means the area has been cleared. Always clear the "Radar Tower" secondary objective first, as it reveals every sample and objective on the entire map.
8. Stealth and Aggro: The Hidden Mechanics of Detection
Many Helldivers believe they must kill every enemy they see. This is the fastest way to fail a mission. Helldivers 2 uses a "Stealth System" based on your stance (Standing, Crouching, Prone). By wearing "Scout" armor and staying prone, you can crawl within 15 meters of a patrol without being detected. This allows you to bypass unnecessary fights and preserve your ammo for the main objectives.
Managing "Heat" and Despawns
The game tracks "Aggro" per player. If you trigger a fight, the "Heat" in that sector increases, causing more patrols to converge on your location. However, if the entire squad moves more than 100 meters away from an active combat zone, the enemies will often "Despawn" to save system resources. "Tactical Retreat" is not cowardice; it is a mechanical exploit that resets the map's difficulty scaling and allows for a fresh start at the next objective.
9. The Final Stand: Extraction Zone Defense
The final two minutes of a mission—the Extraction—is where most runs fail. The landing pad becomes a magnet for every patrol within a 200-meter radius. The key is "Perimeter Setup." Do not stand on the extraction beacon. Instead, move 30 meters away and set up a "Crossfire." This prevents a single "Bile Titan" or "Tank" from crushing the entire team in one localized attack.
Extraction Layout
- Sentries at the Rear: Place "Autocannon Sentries" on high ground behind the landing pad to cover the long-range approach.
- Proximity Mines: Use "Incendiary Mines" on the narrowest chokepoints leading to the pad.
- The Pelican-1 Trick: Once the extraction timer reaches zero, the Pelican-1 will hover and provide "Close Air Support" with its autocannon if no one enters the zone. You can use this to clear the pad before making the final run.
10. The Galactic War: Contributing to the Meta-Game
Every mission you complete contributes to the "Liberation Percentage" of a planet. But not all missions are equal. Completing an entire "Operation" (a set of 3 missions) provides a significantly higher contribution than three separate missions. To truly help Super Earth, you must commit to the full operation. Furthermore, pay attention to "Major Orders"—these provide massive payouts of "Warbond Medals" and often unlock new stratagems for the entire community.
Community Coordination
Join the "Super Earth Discord" or follow community "Supply Lines" maps. Some planets act as "Gateways." If we lose a specific planet, three others might become locked. By focusing your efforts on "Defense Campaigns" rather than "Liberation," you can prevent the enemy from gaining a foothold in nearby sectors. True mastery of Helldivers 2 is realizing that you are one small part of a massive, living machine.